Recipe Ingredients
Here's a breakdown of the main ingredients for this apple pie recipe and why they are important.
For the Double-Crust Pastry
All-Purpose Flour: Provides the structure for the crust. The gluten in flour, when mixed with water, creates elasticity, allowing the dough to be rolled and shaped.
Salt: Enhances the flavor of the crust and controls gluten development.
Cold Shortening: This is crucial for creating a flaky crust. The cold fat separates the flour layers, and as it melts during baking, it creates steam, resulting in flaky layers.
Cold Water: Binds the flour and shortening together. It's important to use cold water to prevent the shortening from melting, which would result in a tough crust.
For the Filling
Sugar: Sweetens the pie and helps to draw out the juices from the apples, creating a syrupy sauce. The amount of sugar can be adjusted based on the tartness of the apples.
All-Purpose Flour: Thickens the apple filling by absorbing some of the juices released during baking.
Ground Cinnamon & Nutmeg: These spices add warmth and depth of flavor to the apple pie, complementing the sweetness of the apples.
Salt: Enhances the overall flavor of the filling.
Tart Apples: The star of the pie! Tart apples like Granny Smith or Braeburn provide a balance to the sweetness of the sugar and hold their shape well during baking, preventing the filling from becoming mushy.
Butter: Adds richness and flavor to the filling. Dotting the filling with butter helps to create a more luscious and flavorful sauce.
How To Make Apple Pie
Here are the general directions for how to make apple pie. But be sure to follow the recipe and refer to the recipe tips and FAQ sections for even more helpful information. Here’s how to make the best homemade apple pie, even if it’s your first time:
1. Mix the Pastry Ingredients
Cut the shortening into the flour and salt, using a pastry blender or fork until the particles are small. This distributes the fat from the shortening so that the pastry will be flaky throughout. For the flakiest crust, you’ll want to use ice-cold water when making the pastry. Add a few ice cubes to a cup of water, measuring one tablespoon of the water at a time, so that no part of the dough gets overly wet before the entire pastry dough is moist.
2. Shape, Chill, and Roll the Dough
Gather the dough into a ball and divide it to form two hamburger patty-shaped rounds, handling it as little as possible, so it won’t become tough. This makes it easier to roll the dough later when it’s cold. Chill the dough to help it become flakier when baked. Roll one pastry round (keep the other in the fridge until you roll it later) with a rolling pin on a floured counter, for the bottom crust. Ease it into the pie plate. Let the excess dough hang over the edge, it will be used later to seal to the top crust.
3. Mix the Apples and Spices
Mix the flour, sugar, and spices in a large bowl and then toss with the apple slices. Add the apple slices into the pastry-lined pie plate. Dot with butter to add a rich dairy flavor to the spiced apple filling.
4. Roll and Seal the Crusts
Roll the remaining pastry round like the one for the bottom crust. Cut slits into the pastry using the tip of a paring knife to allow steam to escape from the apples during baking, so the crust won’t get soggy. Roll and fold the edges of the top and bottom crust to seal in the filling. Cover the edge of the pie with foil to prevent it from getting overdone while baking.
5. Bake the Pie
Bake 25 minutes. Remove the foil and continue baking 15 to 25 minutes longer or until the crust is golden brown and juice begins to bubble through the slits in the crust.
The Best Apples for this Apple Pie Recipe
The best apples to use for pies are those that are tart in flavor and hold up to baking, so that as they soften, they don’t get mushy or mealy in texture. With the sugar that’s added to the pie filling, tart apples provide the perfect balance in flavor for the best-tasting apple pie. Our top apple choices for apple pies are Granny Smith or Braeburn apples. They are the right texture, flavor, and the most economical. You can use either variety or a combination of the two, to get to 8 cups of apple slices. Or for the freshest pie you can make head to your local apple orchard for freshly picked apples. Choose varieties of tart apples with a firm flesh. Check out our baking with apples article for even more information for choosing the perfect apples for baking.
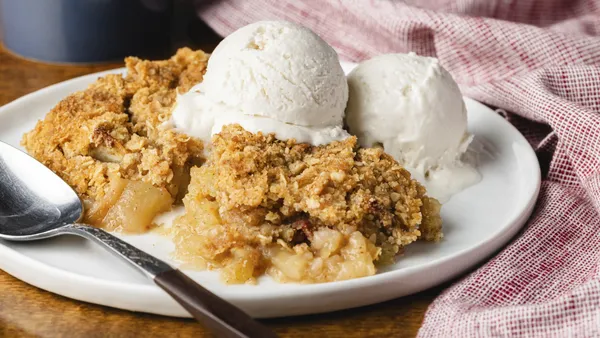
Apple Pie Variations and Toppings
Here are our favorite ways to top an apple pie recipe with crust:
A Little Dairy Does It: Either whipped cream or ice cream is the perfect accompaniment to the spicy, sweet-tart flavor of homemade apple pie. You can make your own sweetened whipped cream, use thawed frozen whipped topping, or whipped cream from a pressurized can. For ice cream, you can’t go wrong with vanilla, but you could use vanilla bean, butter pecan, or caramel. Nothing beats a warm piece of pie with ice cream!
Steal the Toppings: Drizzle your favorite ice cream toppings such as caramel, salted caramel, or butterscotch over pieces of warm pie. Or use caramel apple dip to top your pie. Toffee bits or chopped nuts would also be terrific sprinkled over a dollop of whipped cream or a scoop of ice cream.
Or you can change up the pie altogether! For a delicious variation on classic apple pie, try one of these fan favorites:
Dutch Apple Pie has one traditional bottom crust, but a brown sugar streusel instead of the top crust.
Salted Caramel Slab Pie is Dutch apple pie with a salted caramel topping in a pie made in a sheet pan, so it serves a crowd.
Easy Apple Cups are individual apple pies, using ready-to-bake pie crust and apple pie filling with cinnamon and sugar to get to dessert even faster.
Storing and Reheating Apple Pie
Apple pie is delicious either served warm or at room temperature. Here’s how to store apple pies so you can enjoy them as much as freshly made pies.
Storing Leftover Apple Pie
Wrap any remaining apple pie either in the pie plate or on a serving plate with plastic wrap and store at room temperature up to 2 days or refrigerate up to 7 days.
Reheating Leftover Apple Pie
Place a slice of pie on a microwavable plate. Cover loosely and microwave on medium-high (70%) 30 seconds to 1 1/2 minutes, until warm (time will depend on if the pie was at room temperature or cold from the fridge).
Freezing Apple Pie
Apple pie can be frozen unbaked or baked. To freeze an unbaked apple pie, prepare as directed through step 5—except do not cut slits in top crust and do not cover edge with strip of aluminum foil. Wrap pie and pie plate completely in aluminum foil. Freeze up to 4 months. For baked apple pie, bake and cool pie as directed. Wrap pie and pie plate completely with aluminum foil. Freeze up to 4 months.
Thawing Frozen Baked Apple Pie
Thaw unwrapped pie overnight in refrigerator (about 8 hours) or at room temperature 1 hour, then heat in 375°F oven 35 to 45 minutes or until warm.
Baking Frozen Unbaked Apple Pie
Unwrap pie and cut slits in top crust. Bake at 425°F for 15 minutes. Reduce oven to 375°F; bake 30 to 45 minutes longer or until juices begin to bubble through slits.
Making This Apple Pie with a Premade Crust
Whether you find making pie pasty a little intimidating or want to get a jump on getting this pie in the oven, this delicious recipe will be even quicker to the oven if you start with a pre-made crust. Substitute one package refrigerated ready-to-bake pie crust (2-crusts) for the double-crust pastry ingredients. Soften and roll one pie crust into the pie plate as directed on the package. Pick up the recipe directions, starting with step 4. In step 5, roll the second pie crust and place over filling. Cut slits in top crust. Fold and roll pie crusts, and cover with foil strip as directed.
Frequently Asked Questions
What is shortening?
Shortening is a solid fat made from vegetable oils. You will find it in the baking aisle. Store in the refrigerator, as it needs to be cold to work the best without being sticky. It’s our top choice for making pies, as its flavorless so it doesn’t add any unwanted tastes to your pie crusts so that the filling flavors can shine.
How to make Apple Pie not soggy?
For a tender and flaky pie crust, start with the right pan. Heat resistant glass pie plates are our top choice for baking pies. If you don’t have one of these, use a dull aluminum pan. We don’t recommend shiny or disposable pie pans as they reflect the heat and prevent crusts from browning which could lead to a soggy crust.
How to tell when Apple Pie is done?
Use the visual cues as well as time to determine if the pie is done or not. By keeping the edge of the pie covered with foil until the last 15 minutes or so of baking will ensure the top crust won’t get over baked. Once the foil has been removed and the pie has baked 15 additional minutes, check for both visual doneness cues. Is the edge of the crust golden brown and are juices beginning to bubble through the crust? If one of these cues hasn’t happened yet, add a minute or two of bake time and check again. If possible, avoid opening the oven door and look for these cues through the oven window. Each time the oven door is opened, the temperature of the oven can drop, causing it to take longer to bake the pie.
What is the best way to cut Apple Pie?
Pie that is room temperature or warm will be easier to cut than hot pie and will make the nicest-shaped pieces. Use a sharp, serrated knife to cut through the crusts and filling without making it crumbly. Lift the piece of pie from the pie plate with a pie or cake server (a triangular-shaped spatula).
(function() {
document.addEventListener('DOMContentLoaded', function() {
var componentMetadata = JSON.parse('\x7b\x22componentName\x22\x3a\x22RecipeFAQ_2ee1ece6-a33c-4f37-aafb-6377bfa48ff1\x22,\x22deferOptions\x22\x3a\x7b\x22deferComponent\x22\x3afalse,\x22deferType\x22\x3a\x22None\x22,\x22deferId\x22\x3a\x22rc9a6ee4152304829abd667b42267efbe\x22,\x22deferredContainerId\x22\x3a\x22\x2fmain\x2frdpFAQ\x22,\x22deferredContainerView\x22\x3anull\x7d,\x22viewName\x22\x3a\x22RecipeFAQ\x22\x7d');
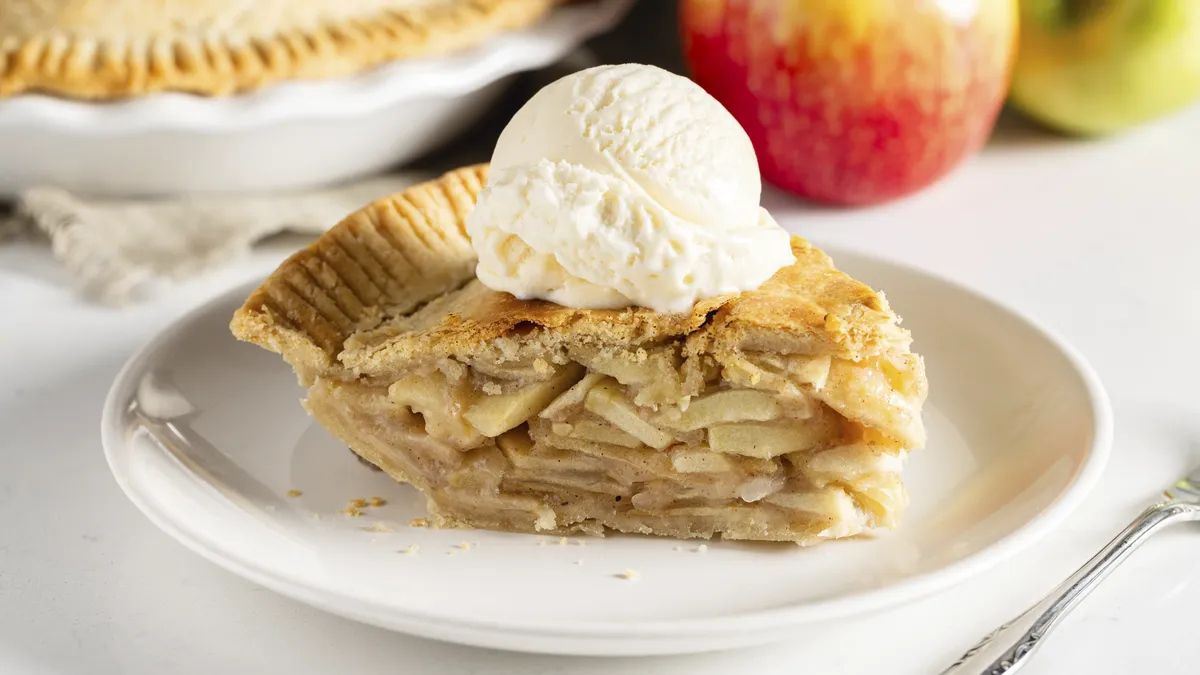
var configuration = {"title":"Apple Pie Recipe","introduction":"\u003cp\u003eMore than just a dessert, apple pie is a symbol of home and comfort. Our recipe combines the warmth of tradition with the ease of modern baking. Picture tender, spiced apples embraced by a flaky, melt-in-your-mouth crust, glazed with a sweet, homemade syrup. From perfecting the crust to achieving the ideal balance of sweet and spice, we\u0027ll show you how to create an apple pie that will become a cherished family favorite. Perfect for holidays, potlucks, or simply making an ordinary day extraordinary.\u003c/p\u003e","servingSize":"1 Slice","image":{"small":{"media":"(min-width: 0px)","src":"https://mojo.generalmills.com/api/public/content/hRIAcy_3TtqSz-0_2SahNQ_webp_base.webp?v=ec08d0e3\u0026t=e724eca7b3c24a8aaa6e089ed9e611fd"},"medium":{"media":"(min-width: 500px)","src":"https://mojo.generalmills.com/api/public/content/hRIAcy_3TtqSz-0_2SahNQ_webp_base.webp?v=ec08d0e3\u0026t=191ddcab8d1c415fa10fa00a14351227"},"large":{"media":"(min-width: 767px)","src":"https://mojo.generalmills.com/api/public/content/hRIAcy_3TtqSz-0_2SahNQ_webp_base.webp?v=ec08d0e3\u0026t=191ddcab8d1c415fa10fa00a14351227"},"alt":"Apple Pie Recipe"},"contributor":{"label":"By","name":"Edited by Angela Ritchie","profileUrl":"/about-us/angela","displayDate":{"label":"Updated","date":"Oct 13, 2025"}},"ingredientGroups":[{"name":"Double-Crust Pastry","ingredients":[{"quantity":"2","description":"cups plus 2 tablespoons Gold Medal™ All Purpose Flour"},{"quantity":"1","description":"teaspoon salt"},{"quantity":"2/3","description":"cup cold shortening"},{"quantity":"4","description":"to 6 tablespoons cold water"}]},{"name":"Filling","ingredients":[{"quantity":"1/3","description":"to 1/2 cup sugar"},{"quantity":"1/4","description":"cup Gold Medal™ All Purpose Flour"},{"quantity":"1/2","description":"teaspoon ground cinnamon"},{"quantity":"1/2","description":"teaspoon ground nutmeg"},{"quantity":"1/8","description":"teaspoon salt"},{"quantity":"8","description":"cups thinly sliced peeled tart apples (8 medium)"},{"quantity":"2","description":"tablespoons butter"}]}],"steps":[{"description":"In medium bowl, mix 2 cups flour and 1 teaspoon salt. Cut in shortening, using pastry blender (or pulling 2 table knives through ingredients in opposite directions), until particles are size of small peas. Sprinkle with cold water, 1 tablespoon at a time, tossing with fork until all flour is moistened and pastry almost cleans side of bowl (1 to 2 teaspoons more water can be added if necessary).","stepShotImageUrl":"//mojo.generalmills.com/api/public/content/QA38DqwDSVCyoFLmPpF_HA_webp_base.webp?v=194fa0cd\u0026t=51a43a57af4046789e5a7f20567b1195"},{"description":"Gather pastry into a ball. Divide in half; shape into 2 flattened rounds on lightly floured surface. Wrap in plastic wrap; refrigerate about 45 minutes or until dough is firm and cold, yet pliable. This allows the shortening to become slightly firm, which helps make the baked pastry more flaky. If refrigerated longer, let pastry soften slightly before rolling.","stepShotImageUrl":"//mojo.generalmills.com/api/public/content/6fGU8J8yQU6nGFlCAITxqQ_webp_base.webp?v=0f8f0e7c\u0026t=51a43a57af4046789e5a7f20567b1195"},{"description":"Heat oven to 425°F. With floured rolling pin, roll one pastry round into round 2 inches larger than upside-down 9-inch glass pie plate. Fold pastry into fourths; place in pie plate. Unfold and ease into plate, pressing firmly against bottom and side.","stepShotImageUrl":"//mojo.generalmills.com/api/public/content/cmrxIrNfT5SmcOz6TUfS4w_webp_base.webp?v=fe6968f9\u0026t=51a43a57af4046789e5a7f20567b1195"},{"description":"In large bowl, mix sugar, 1/4 cup flour, cinnamon, nutmeg and 1/8 teaspoon salt. Stir in apples. Spoon into pastry-lined pie plate. Dot with butter. Trim overhanging edge of pastry 1/2 inch from rim of plate.","stepShotImageUrl":"//mojo.generalmills.com/api/public/content/MEUS2-AaTeOTpf4olKmfxQ_webp_base.webp?v=3f6103f1\u0026t=51a43a57af4046789e5a7f20567b1195"},{"description":"Roll other round of pastry. Fold into fourths and cut slits so steam can escape. Unfold top pastry over filling; trim overhanging edge 1 inch from rim of plate. Fold and roll top edge under lower edge, pressing on rim to seal; flute as desired. Cover edge with 3-inch strip of aluminum foil to prevent excessive browning. Remove foil during last 15 minutes of baking. ","stepShotImageUrl":"//mojo.generalmills.com/api/public/content/6CTotPmhT-6QLPcLEjnMxA_webp_base.webp?v=809c4528\u0026t=51a43a57af4046789e5a7f20567b1195"},{"description":"Bake 40 to 50 minutes or until crust is brown and juice begins to bubble through slits in crust. Serve warm if desired. "}],"tips":[{"title":"","description":"Betty’s scrumptious apple pie recipe shows you step-by-step, how to make a flaky crust with a perfectly spiced fresh apple filling, you’ll be proud to serve.","category":"Rich Snippet","tipShots":[]},{"title":"","description":"Lay a sheet of foil on a cookie sheet on lower oven rack below pie pan in case of boil overs.","category":"Method Note","tipShots":[]},{"title":"","description":"For a nice defined crimped crust, lay the top pastry over the apple filling and press it firmly against the overhang of the bottom crust. Fold the pastry together and over to build up an even ridge of dough. Use the handle of a wooden spoon to mark evenly spaced sections to twist with your fingers into a decorative edge.","category":"Techniques","tipShots":[]},{"title":"","description":"The strip of foil around the edge of the pie as it goes in the oven ensures that the top crust won\u0027t over bake before the bottom crust gets done. Be sure to remove it after 25 minutes, though, so the edge can brown.","category":"Recipe/Ingredient Facts","tipShots":[]},{"title":"","description":"For a glazy top crust, brush with milk or cream and sprinkle on some sparkly sugar before sliding it into the oven. Use small cookie cutters to cut out shapes from top crust before placing it on filling or use a small paring knife to cut slits to create vents to release steam.","category":"Techniques","tipShots":[]},{"title":"","description":"Recipe meets Kitchen Tested criteria. Reviewed as part of project MSO-5941 BC Audit 200 recipes","category":"Kitchen Tested","tipShots":[]}],"kitchenTips":[{"title":"","description":"Lay a sheet of foil on a cookie sheet on lower oven rack below pie pan in case of boil overs.","category":"Method Note","tipShots":[]},{"title":"","description":"For a nice defined crimped crust, lay the top pastry over the apple filling and press it firmly against the overhang of the bottom crust. Fold the pastry together and over to build up an even ridge of dough. Use the handle of a wooden spoon to mark evenly spaced sections to twist with your fingers into a decorative edge.","category":"Techniques","tipShots":[]},{"title":"","description":"The strip of foil around the edge of the pie as it goes in the oven ensures that the top crust won\u0027t over bake before the bottom crust gets done. Be sure to remove it after 25 minutes, though, so the edge can brown.","category":"Recipe/Ingredient Facts","tipShots":[]},{"title":"","description":"For a glazy top crust, brush with milk or cream and sprinkle on some sparkly sugar before sliding it into the oven. Use small cookie cutters to cut out shapes from top crust before placing it on filling or use a small paring knife to cut slits to create vents to release steam.","category":"Techniques","tipShots":[]}],"additionalContent":[{"title":"Recipe Ingredients","description":"\u003cp\u003eHere\u0027s a breakdown of the main ingredients for this apple pie recipe and why they are important.\u003c/p\u003e\u003cp\u003e\u003cstrong\u003eFor the Double-Crust Pastry\u003c/strong\u003e\u003c/p\u003e\u003cp\u003e\u003cstrong\u003eAll-Purpose Flour:\u003c/strong\u003e\u0026nbsp;Provides the structure for the crust. The gluten in flour, when mixed with water, creates elasticity, allowing the dough to be rolled and shaped.\u003c/p\u003e\u003cp\u003e\u003cstrong\u003eSalt:\u003c/strong\u003e\u0026nbsp;Enhances the flavor of the crust and controls gluten development.\u003c/p\u003e\u003cp\u003e\u003cstrong\u003eCold Shortening:\u003c/strong\u003e\u0026nbsp;This is crucial for creating a flaky crust. The cold fat separates the flour layers, and as it melts during baking, it creates steam, resulting in flaky layers.\u003c/p\u003e\u003cp\u003e\u003cstrong\u003eCold Water:\u003c/strong\u003e\u0026nbsp;Binds the flour and shortening together. It\u0027s important to use cold water to prevent the shortening from melting, which would result in a tough crust.\u003c/p\u003e\u003cp\u003e\u003cstrong\u003eFor the Filling\u003c/strong\u003e\u003c/p\u003e\u003cp\u003e\u003cstrong\u003eSugar:\u003c/strong\u003e\u0026nbsp;Sweetens the pie and helps to draw out the juices from the apples, creating a syrupy sauce. The amount of sugar can be adjusted based on the tartness of the apples.\u003c/p\u003e\u003cp\u003e\u003cstrong\u003eAll-Purpose Flour:\u003c/strong\u003e\u0026nbsp;Thickens the apple filling by absorbing some of the juices released during baking.\u003c/p\u003e\u003cp\u003e\u003cstrong\u003eGround Cinnamon \u0026amp; Nutmeg:\u003c/strong\u003e\u0026nbsp;These spices add warmth and depth of flavor to the apple pie, complementing the sweetness of the apples.\u003c/p\u003e\u003cp\u003e\u003cstrong\u003eSalt:\u003c/strong\u003e\u0026nbsp;Enhances the overall flavor of the filling.\u003c/p\u003e\u003cp\u003e\u003cstrong\u003eTart Apples:\u003c/strong\u003e\u0026nbsp;The star of the pie! Tart apples like Granny Smith or Braeburn provide a balance to the sweetness of the sugar and hold their shape well during baking, preventing the filling from becoming mushy.\u003c/p\u003e\u003cp\u003e\u003cstrong\u003eButter:\u003c/strong\u003e\u0026nbsp;Adds richness and flavor to the filling. Dotting the filling with butter helps to create a more luscious and flavorful sauce.\u003c/p\u003e","category":"SEO Content_1","tipShots":[{"name":"ExtraTextTypeImageMediumUrl","sortOrder":1,"url":"//mojo.generalmills.com/api/public/content/0iSFDHkORRml3r4ao7VZiA_webp_base.webp?v=e7a0df42\u0026t=51a43a57af4046789e5a7f20567b1195"}]},{"title":"How To Make Apple Pie","description":"\u003cp\u003eHere are the general directions for how to make apple pie. But be sure to follow the recipe and refer to the recipe tips and FAQ sections for even more helpful information. Here’s how to make the best homemade apple pie, even if it’s your first time:\u003c/p\u003e\u003ch3\u003e\u003cstrong\u003e1. Mix the Pastry Ingredients\u003c/strong\u003e\u003c/h3\u003e\u003cp\u003eCut the shortening into the flour and salt, using a pastry blender or fork until the particles are small. This distributes the fat from the shortening so that the pastry will be flaky throughout. For the flakiest crust, you’ll want to use ice-cold water when making the pastry. Add a few ice cubes to a cup of water, measuring one tablespoon of the water at a time, so that no part of the dough gets overly wet before the entire pastry dough is moist.\u003c/p\u003e\u003ch3\u003e\u003cstrong\u003e2. Shape, Chill, and Roll the Dough\u003c/strong\u003e\u003c/h3\u003e\u003cp\u003eGather the dough into a ball and divide it to form two hamburger patty-shaped rounds, handling it as little as possible, so it won’t become tough. This makes it easier to roll the dough later when it’s cold. Chill the dough to help it become flakier when baked. Roll one pastry round (keep the other in the fridge until you roll it later) with a rolling pin on a floured counter, for the bottom crust. Ease it into the pie plate. Let the excess dough hang over the edge, it will be used later to seal to the top crust.\u003c/p\u003e\u003ch3\u003e\u003cstrong\u003e3. Mix the Apples and Spices\u003c/strong\u003e\u003c/h3\u003e\u003cp\u003eMix the flour, sugar, and spices in a large bowl and then toss with the apple slices. Add the apple slices into the pastry-lined pie plate. Dot with butter to add a rich dairy flavor to the spiced apple filling.\u003c/p\u003e\u003ch3\u003e\u003cstrong\u003e4. Roll and Seal the Crusts\u003c/strong\u003e\u003c/h3\u003e\u003cp\u003eRoll the remaining pastry round like the one for the bottom crust. Cut slits into the pastry using the tip of a paring knife to allow steam to escape from the apples during baking, so the crust won’t get soggy. Roll and fold the edges of the top and bottom crust to seal in the filling. Cover the edge of the pie with foil to prevent it from getting overdone while baking.\u003c/p\u003e\u003ch3\u003e\u003cstrong\u003e5. Bake the Pie\u003c/strong\u003e\u003c/h3\u003e\u003cp\u003eBake 25 minutes. Remove the foil and continue baking 15 to 25 minutes longer or until the crust is golden brown and juice begins to bubble through the slits in the crust.\u003c/p\u003e","category":"SEO Content_2","tipShots":[]},{"title":"The Best Apples for this Apple Pie Recipe","description":"\u003cp\u003eThe best apples to use for pies are those that are tart in flavor and hold up to baking, so that as they soften, they don’t get mushy or mealy in texture. With the sugar that’s added to the pie filling, tart apples provide the perfect balance in flavor for the best-tasting apple pie. Our top apple choices for apple pies are Granny Smith or Braeburn apples. They are the right texture, flavor, and the most economical. You can use either variety or a combination of the two, to get to 8 cups of apple slices. Or for the freshest pie you can make head to your local apple orchard for freshly picked apples. Choose varieties of tart apples with a firm flesh. Check out our \u003ca href=\u0022 https://www.bettycrocker.com/how-to/best-apples-to-bake-with\u0022\u003ebaking with apples\u003c/a\u003e article for even more information for choosing the perfect apples for baking.\u003c/p\u003e","category":"SEO Content_3","tipShots":[]},{"title":"Apple Pie Variations and Toppings","description":"\u003cp\u003eHere are our favorite ways to top an apple pie recipe with crust:\u003c/p\u003e\u003cp\u003e\u003cstrong\u003eA Little Dairy Does It:\u003c/strong\u003e Either whipped cream or ice cream is the perfect accompaniment to the spicy, sweet-tart flavor of homemade apple pie. You can make your own \u003ca href=\u0022https://www.bettycrocker.com/recipes/homemade-whipped-cream/6f80a75b-7a7d-43d6-a6ef-eae48ddb0f30\u0022\u003esweetened whipped cream\u003c/a\u003e, use thawed frozen whipped topping, or whipped cream from a pressurized can. For ice cream, you can’t go wrong with vanilla, but you could use vanilla bean, butter pecan, or caramel. Nothing beats a warm piece of pie with ice cream!\u003c/p\u003e\u003cp\u003e\u003cstrong\u003eSteal the Toppings:\u003c/strong\u003e Drizzle your favorite ice cream toppings such as caramel, salted caramel, or butterscotch over pieces of warm pie. Or use caramel apple dip to top your pie. Toffee bits or chopped nuts would also be terrific sprinkled over a dollop of whipped cream or a scoop of ice cream.\u003c/p\u003e\u003cp\u003eOr you can change up the pie altogether! For a delicious variation on classic apple pie, try one of these fan favorites:\u003c/p\u003e\u003cp\u003e\u003ca href=\u0022https://www.bettycrocker.com/recipes/dutch-apple-pie/815d821f-058d-4177-93be-e157390e947b\u0022\u003e\u003cstrong\u003eDutch Apple Pie\u003c/strong\u003e\u003c/a\u003e\u003cstrong\u003e \u003c/strong\u003ehas one traditional bottom crust, but a brown sugar streusel instead of the top crust.\u003c/p\u003e\u003cp\u003e\u003ca href=\u0022https://www.bettycrocker.com/recipes/salted-caramel-apple-slab-pie/8dd47cd1-369d-4b7a-9108-8d0bfa0d6a5c\u0022\u003e\u003cstrong\u003eSalted Caramel Slab Pie\u003c/strong\u003e\u003c/a\u003e\u003cstrong\u003e \u003c/strong\u003eis Dutch apple pie with a salted caramel topping in a pie made in a sheet pan, so it serves a crowd.\u003c/p\u003e\u003cp\u003e\u003ca href=\u0022https://www.bettycrocker.com/recipes/easy-apple-pie-cups/73dfa3eb-0d4d-4fd1-9001-e9788af258c2\u0022\u003e\u003cstrong\u003eEasy Apple Cups\u003c/strong\u003e\u003c/a\u003e\u003cstrong\u003e \u003c/strong\u003eare individual apple pies, using ready-to-bake pie crust and apple pie filling with cinnamon and sugar to get to dessert even faster.\u003c/p\u003e","category":"SEO Content_4","tipShots":[]},{"title":"Storing and Reheating Apple Pie","description":"\u003cp\u003eApple pie is delicious either served warm or at room temperature. Here’s how to store apple pies so you can enjoy them as much as freshly made pies.\u003c/p\u003e\u003ch3\u003e\u003cstrong\u003eStoring Leftover Apple Pie\u003c/strong\u003e\u003c/h3\u003e\u003cp\u003eWrap any remaining apple pie either in the pie plate or on a serving plate with plastic wrap and store at room temperature up to 2 days or refrigerate up to 7 days.\u003c/p\u003e\u003ch3\u003e\u003cstrong\u003eReheating Leftover Apple Pie\u003c/strong\u003e\u003c/h3\u003e\u003cp\u003ePlace a slice of pie on a microwavable plate. Cover loosely and microwave on medium-high (70%) 30 seconds to 1 1/2 minutes, until warm (time will depend on if the pie was at room temperature or cold from the fridge).\u003c/p\u003e\u003ch3\u003e\u003cstrong\u003eFreezing Apple Pie\u003c/strong\u003e\u003c/h3\u003e\u003cp\u003eApple pie can be frozen unbaked or baked. To freeze an unbaked apple pie, prepare as directed through step 5—except do not cut slits in top crust and do not cover edge with strip of aluminum foil. Wrap pie and pie plate completely in aluminum foil. Freeze up to 4 months. For baked apple pie, bake and cool pie as directed. Wrap pie and pie plate completely with aluminum foil. Freeze up to 4 months.\u003c/p\u003e\u003ch3\u003e\u003cstrong\u003eThawing Frozen Baked Apple Pie\u003c/strong\u003e\u003c/h3\u003e\u003cp\u003eThaw unwrapped pie overnight in refrigerator (about 8 hours) or at room temperature 1 hour, then heat in 375°F oven 35 to 45 minutes or until warm.\u003c/p\u003e\u003ch3\u003e\u003cstrong\u003eBaking Frozen Unbaked Apple Pie\u003c/strong\u003e\u003c/h3\u003e\u003cp\u003eUnwrap pie and cut slits in top crust. Bake at 425°F for 15 minutes. Reduce oven to 375°F; bake 30 to 45 minutes longer or until juices begin to bubble through slits.\u003c/p\u003e","category":"SEO Content_5","tipShots":[]},{"title":"Making This Apple Pie with a Premade Crust","description":"\u003cp\u003eWhether you find making pie pasty a little intimidating or want to get a jump on getting this pie in the oven, this delicious recipe will be even quicker to the oven if you start with a pre-made crust. Substitute one package refrigerated ready-to-bake pie crust (2-crusts) for the double-crust pastry ingredients. Soften and roll one pie crust into the pie plate as directed on the package. Pick up the recipe directions, starting with step 4. In step 5, roll the second pie crust and place over filling. Cut slits in top crust. Fold and roll pie crusts, and cover with foil strip as directed.\u003c/p\u003e","category":"SEO Content_6","tipShots":[]}],"faq":[{"title":"What is shortening?","description":"\u003cp\u003eShortening is a solid fat made from vegetable oils. You will find it in the baking aisle. Store in the refrigerator, as it needs to be cold to work the best without being sticky. It’s our top choice for making pies, as its flavorless so it doesn’t add any unwanted tastes to your pie crusts so that the filling flavors can shine.\u003c/p\u003e","category":"FAQ_1","tipShots":[]},{"title":"How to make Apple Pie not soggy?","description":"\u003cp\u003eFor a tender and flaky pie crust, start with the right pan. Heat resistant glass pie plates are our top choice for baking pies. If you don’t have one of these, use a dull aluminum pan. We don’t recommend shiny or disposable pie pans as they reflect the heat and prevent crusts from browning which could lead to a soggy crust.\u003c/p\u003e","category":"FAQ_2","tipShots":[]},{"title":"How to tell when Apple Pie is done?","description":"\u003cp\u003eUse the visual cues as well as time to determine if the pie is done or not. By keeping the edge of the pie covered with foil until the last 15 minutes or so of baking will ensure the top crust won’t get over baked. Once the foil has been removed and the pie has baked 15 additional minutes, check for both visual doneness cues. Is the edge of the crust golden brown and are juices beginning to bubble through the crust? If one of these cues hasn’t happened yet, add a minute or two of bake time and check again. If possible, avoid opening the oven door and look for these cues through the oven window. Each time the oven door is opened, the temperature of the oven can drop, causing it to take longer to bake the pie.\u003c/p\u003e","category":"FAQ_3","tipShots":[]},{"title":"What is the best way to cut Apple Pie?","description":"\u003cp\u003ePie that is room temperature or warm will be easier to cut than hot pie and will make the nicest-shaped pieces. Use a sharp, serrated knife to cut through the crusts and filling without making it crumbly. Lift the piece of pie from the pie plate with a pie or cake server (a triangular-shaped spatula).\u003c/p\u003e","category":"FAQ_4","tipShots":[]}],"tipCategories":[{"categoryName":"Kitchen Tested","heading":"More About This Recipe","cssClass":"recipePartStory","expandOnInit":false,"expandText":"More +","collapseText":"Less -","expandEventName":"","collapseEventName":"","image":"","tips":[{"title":"","description":"Recipe meets Kitchen Tested criteria. Reviewed as part of project MSO-5941 BC Audit 200 recipes","category":"Kitchen Tested","tipShots":[]}],"isExpandable":false},{"categoryName":"Method Note","heading":"","cssClass":"recipePartMethodNote","expandOnInit":false,"expandText":"More +","collapseText":"Less -","expandEventName":"","collapseEventName":"","image":"","tips":[{"title":"","description":"Lay a sheet of foil on a cookie sheet on lower oven rack below pie pan in case of boil overs.","category":"Method Note","tipShots":[]}],"isExpandable":false},{"categoryName":"Rich Snippet","heading":"","cssClass":"recipePartMethodNote","expandOnInit":false,"expandText":"More +","collapseText":"Less -","expandEventName":"","collapseEventName":"","image":"","tips":[{"title":"","description":"Betty’s scrumptious apple pie recipe shows you step-by-step, how to make a flaky crust with a perfectly spiced fresh apple filling, you’ll be proud to serve.","category":"Rich Snippet","tipShots":[]}],"isExpandable":false}],"nutritionInfo":{"configuration":{"showAsTable":false,"noNutritionInformationAvailableMessage":"Nutrition Facts are not available for this recipe","poweredByText":"\u003cp\u003eNutrition information for this recipe is estimated using a leading nutrition calculation application, but is an estimate only. Actual nutrition values will vary based on the exact ingredients or brands you may use.\u003c/p\u003e\n\u003ca href=\u0022http://developer.edamam.com\u0022\u003ePowered By \u003cimg src=\u0022-/media/05422024943D4056883B09BBC2576F20.ashx\u0022 alt=\u0022Edamam\u0022 /\u003e\u003c/a\u003e","nutritionChartTitle":"Nutrition Facts","nutritionInformationLabel":"Nutrition","servingSizeText":"Serving Size:","dailyValuesDisclaimer":"*Percent Daily Values are based on a 2,000 calorie diet.","percentDailyValueText":"% Daily Value","percentDailyValueFooterTitleText":"% Daily Value*:","exchangeInformationTitleText":"Exchanges:","nutritionFactsExpandText":"More Nutrition","nutritionFactsCollapseText":"Less Nutrition"},"servingSize":"1 Slice","exchangeInfo":"Free","showPoweredBy":false,"showRecipeTotalTime":true,"showRecipePrepTime":true,"showCarbohydrateChoices":false},"trademarks":[],"labels":{"ingredientsHeader":"Ingredients","stepsHeader":"Instructions","stepsImageHideText":"Hide Images","stepsImageShowText":"Show Images","stepNumberText":"Step","faqHeader":"Frequently Asked Questions","tipsHeader":"Recipe Tips","tipItemHeadingFormat":"tip {0}","postedBy":"By","copyright":"© {yyyy} ®/TM General Mills All Rights Reserved","showDrawerText":"Show ","hideDrawerText":"Hide","expandDescriptionText":"More +","collapseDescriptionText":"Less -","ariaLiveLabelFormat":"Showing {0} through {1} of {2}","scrollLeftButtonLabel":"Scroll Left","scrollRightButtonLabel":"Scroll Right","includeScrollIndicator":true},"primaryAttributes":[{"label":"Prep Time","values":[{"text":"45","label":"min"}]},{"label":"Total","values":[{"text":"2","label":"hr"},{"text":"20","label":"min"}]},{"label":"Servings","values":[{"text":"8"}]},{"label":"Ingredients","values":[{"text":"11"}]}],"secondaryAttributes":[],"badges":[{"badgeType":3,"badgeText":"","label":"kitchen tested","imageUrl":"/-/media/GMI/Core-Sites/BC/Images/Shared/RecipeParts/KitchenTested_BC1_new.jpg?sc_lang=en","linkUrl":"/about-us/kitchen-tested","metaDataTags":[],"showMemberInfo":false,"matchedMetadataId":"00000000-0000-0000-0000-000000000000"},{"badgeType":2,"badgeText":"Gold Medal Flour","label":"Make With","imageUrl":"/-/media/GMI/Core-Sites/BC/Images/Shared/RecipeParts/make-with/Package_GoldMedalv3.png?sc_lang=en","metaDataTags":["9223a3ed-9c14-580f-b9e7-f31f0ba02c9e"],"showMemberInfo":false,"matchedMetadataId":"9223a3ed-9c14-580f-b9e7-f31f0ba02c9e"}],"backgroundImageUrl":"/-/media/GMI/Core-Sites/BC/Images/Shared/RecipeParts/img-bc-rdp-heroDotPattern.png?sc_lang=en","breadcrumbs":{"links":[{"url":"/","label":"Home"},{"url":"/recipes","label":"Recipes"},{"url":"/recipes/dishes/pie-and-tart-recipes","label":"Pie Recipes"}],"currentPageName":"Apple Pie Recipe"}};
var moduleName = 'recipeFaq';
var isVueModule = true;
GeneralMills.PandoSites.RegisterControlInstance(moduleName, configuration, componentMetadata, isVueModule)
});
})();