(function() {
document.addEventListener('DOMContentLoaded', function() {
var componentMetadata = JSON.parse('\x7b\x22componentName\x22\x3a\x22ChannelLinks_8918a218-1030-4c2b-87de-605f1d7de656\x22,\x22deferOptions\x22\x3a\x7b\x22deferComponent\x22\x3afalse,\x22deferType\x22\x3a\x22None\x22,\x22deferId\x22\x3a\x22r7c22adedd6014833bfcdc531cf7ada74\x22,\x22deferredContainerId\x22\x3a\x22\x2fchannelLinks\x22,\x22deferredContainerView\x22\x3anull\x7d,\x22viewName\x22\x3a\x22ChannelLinks\x22\x7d');
var configuration = {};
var moduleName = 'channelLinks';
var isVueModule = true;
GeneralMills.PandoSites.RegisterControlInstance(moduleName, configuration, componentMetadata, isVueModule)
});
})();
(function() {
document.addEventListener('DOMContentLoaded', function() {
var componentMetadata = JSON.parse('\x7b\x22componentName\x22\x3a\x22ActionToolbar_59e5fa31-dc57-46ea-93d1-265650a760f0\x22,\x22deferOptions\x22\x3a\x7b\x22deferComponent\x22\x3atrue,\x22deferType\x22\x3a\x22OnDemand\x22,\x22deferId\x22\x3a\x22r92de51f3629d49349b4ce9a333fb03df\x22,\x22deferredContainerId\x22\x3a\x22\x2ffloatingActionToolbar\x2ffloatingActionToolbar_interop\x22,\x22deferredContainerView\x22\x3a\x22InteropDeferWrapper\x22\x7d,\x22viewName\x22\x3a\x22ActionToolbar\x22\x7d');
var configuration = {"contentId":"a0de5156-cecc-4461-bb39-279a43e76e9f","toolbarSettings":{"id":"59e5fa31-dc57-46ea-93d1-265650a760f0","regAction":"FAVORITE","eSourceCode":11275,"namePassedToEvents":"ArticleStandardLongFormToolbar","buttons":[{"addFavoriteErrorMessage":"Sorry, something went wrong. Please save again.","removeFavoriteErrorMessage":"Error occurred while removing from favorites","regAction":"FAVORITE","eSourceCode":11275,"isCurrentUserAnonymous":false,"isFavoriteItem":false,"id":"16a29701-2b75-4d9a-aa9c-860376da50d7","allowedForAnonymousUsers":false,"type":"Favorite","displayName":"Save","namePassedToEvents":"Favorite","cssClassName":"atButtonFavorite","privacyOptOutMessage":"\u003cdiv class=\u0027privacyMessage\u0027\u003e\n\u003ch3\u003eThis feature is not available with your current cookie settings.\u003c/h3\u003e\n\u003cp\u003eYou can \u003ca href=\u0027#\u0027 data-show-preference-center=\u00271\u0027\u003eupdate your privacy settings\u003c/a\u003e to enable this content. Please enable “Functional Cookies” to use this feature.\u003c/p\u003e\n\u003c/div\u003e","showPrivacyOptOutMessage":false},{"providerName":"pinterest","providerNamePassedToEvents":"Pinterest","shareUrlFormat":"//pinterest.com/pin/create/link/?url={0}","id":"c18cf08e-e436-4cd0-a180-1bafb15369a6","allowedForAnonymousUsers":true,"type":"Social","displayName":"Pinterest","namePassedToEvents":"Pinterest","cssClassName":"atButtonPinterest","privacyOptOutMessage":"\u003cdiv class=\u0027privacyMessage\u0027\u003e\n\u003ch3\u003eThis feature is not available with your current cookie settings.\u003c/h3\u003e\n\u003cp\u003eYou can \u003ca href=\u0027#\u0027 data-show-preference-center=\u00271\u0027\u003eupdate your privacy settings\u003c/a\u003e to enable this content. Please enable “Functional Cookies” to use this feature.\u003c/p\u003e\n\u003c/div\u003e","showPrivacyOptOutMessage":false},{"templateId":"13bdd311-4300-4fb8-9d78-9cbaf98f5578","dialogHeading":"Email Article","emailCode":"BC_ContentEmail","dialogSettings":{"cancelButtonText":"Cancel","copyToSenderLabel":"Send a Copy to Myself","emailAddressesLabel":"* Email Address(es)","emailInstructionText":"Separate email addresses with commas","fromText":"From:","privacyPolicyText":"\u003cp\u003e\u0026copy;2024 General Mills, Inc. All Rights Reserved. This information will only be used to send an email to your friend(s) and will not be saved. Please read our \u003ca rel=\u0022noopener noreferrer\u0022 rel=\u0022noopener noreferrer\u0022 href=\u0022http://www.generalmills.com/company/privacy-policies/privacy-policy-us\u0022 target=\u0022_blank\u0022 shape=\u0022rect\u0022\u003ePrivacy Policy\u003c/a\u003e.\u003c/p\u003e","requiredFieldText":"* Required","sendButtonText":"Send","senderEmailAddressLabel":"* Your Email Address","senderFirstNameLabel":"* Your First Name","sendToText":"Send To:"},"id":"be9422a3-85a8-4c31-86f5-e171255bb89d","allowedForAnonymousUsers":true,"type":"Email","displayName":"Email","namePassedToEvents":"Email","cssClassName":"atButtonEmail","privacyOptOutMessage":"\u003cdiv class=\u0027privacyMessage\u0027\u003e\n\u003ch3\u003eThis feature is not available with your current cookie settings.\u003c/h3\u003e\n\u003cp\u003eYou can \u003ca href=\u0027#\u0027 data-show-preference-center=\u00271\u0027\u003eupdate your privacy settings\u003c/a\u003e to enable this content. Please enable “Functional Cookies” to use this feature.\u003c/p\u003e\n\u003c/div\u003e","showPrivacyOptOutMessage":false},{"providerName":"facebook","providerNamePassedToEvents":"Facebook","shareUrlFormat":"//facebook.com/sharer/sharer.php?u={0}","id":"6c3f442d-6ffe-460f-8360-b02b122d326c","allowedForAnonymousUsers":true,"type":"Social","displayName":"Facebook","namePassedToEvents":"Facebook","cssClassName":"atButtonFacebook","privacyOptOutMessage":"\u003cdiv class=\u0027privacyMessage\u0027\u003e\n\u003ch3\u003eThis feature is not available with your current cookie settings.\u003c/h3\u003e\n\u003cp\u003eYou can \u003ca href=\u0027#\u0027 data-show-preference-center=\u00271\u0027\u003eupdate your privacy settings\u003c/a\u003e to enable this content. Please enable “Functional Cookies” to use this feature.\u003c/p\u003e\n\u003c/div\u003e","showPrivacyOptOutMessage":false},{"layoutParameter":"p%3d1","id":"de022929-4416-4bc9-ab3c-ae5711d562bf","allowedForAnonymousUsers":true,"type":"Print","displayName":"Print","namePassedToEvents":"Print","cssClassName":"atButtonPrint","privacyOptOutMessage":"\u003cdiv class=\u0027privacyMessage\u0027\u003e\n\u003ch3\u003eThis feature is not available with your current cookie settings.\u003c/h3\u003e\n\u003cp\u003eYou can \u003ca href=\u0027#\u0027 data-show-preference-center=\u00271\u0027\u003eupdate your privacy settings\u003c/a\u003e to enable this content. Please enable “Functional Cookies” to use this feature.\u003c/p\u003e\n\u003c/div\u003e","showPrivacyOptOutMessage":false}],"isSticky":true},"userSettings":{"isCurrentUserAnonymous":true,"isFavoriteItem":false},"pageAttributes":{"url":"https%3a%2f%2fwww.bettycrocker.com%2fhow-to%2ftipslibrary%2fbaking-tips%2fTen-Must-Have-Cookie-Tools","contentId":"a0de5156-cecc-4461-bb39-279a43e76e9f"},"recaptchaPublicKey":"6LfU_icUAAAAALSqSjRg5hqZwbPr1b8k-_80a_S_"};
var moduleName = 'actionToolbar';
var isVueModule = true;
GeneralMills.PandoSites.RegisterControlInstance(moduleName, configuration, componentMetadata, isVueModule)
});
})();
Do I really need a cooling rack? What’s the deal with cookie scoops? Is parchment paper the same as waxed paper? We took these questions and more to the Betty Crocker Test Kitchen’s pastry chef, Carrie Franzen—the brain behind Betty’s Christmas cookies and many more desserts. Carrie shared her list of essential, nice-to-have and semi-pro tools to help us make sense of all the baking equipment out there.
(For the record, the answers to the above questions are: yes, you need a cooling rack; once you get a cookie scoop, you’ll wonder how you lived without it for so long; and no—parchment and waxed paper are very different!)
The Essential Cookie Making Tools
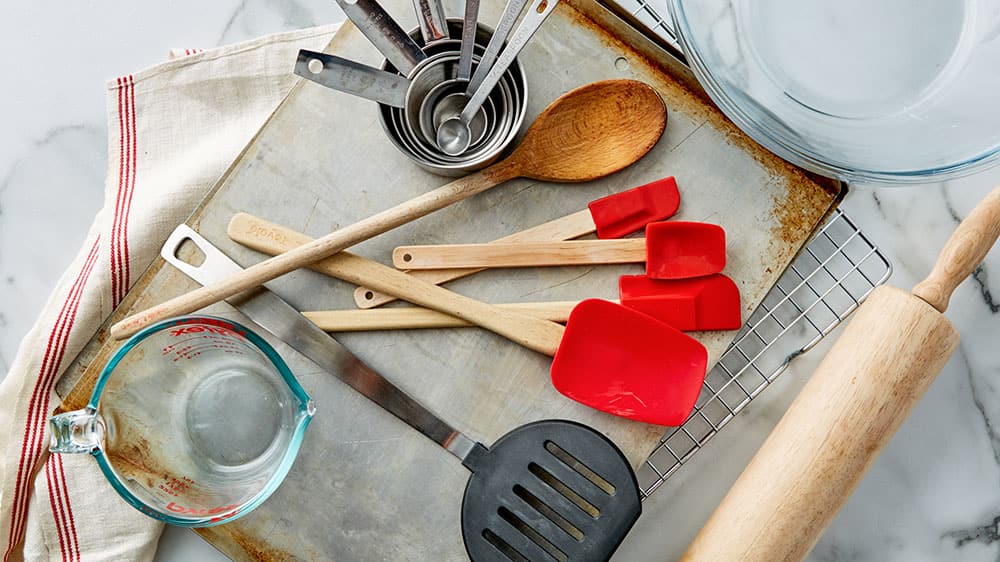
Just as cookies are relatively simple baked treats, the tools needed to make them are too. You likely have basics, like:
- a mixing bowl,
- a wooden spoon for stirring,
- rubber spatulas in a couple different sizes for scraping out your bowl and
- a silicone spatula or flat, thin metal spatula for removing hot, fragile cookies from their baking sheet.
In addition to these basics, you’ll need the correct cookie sheets and measuring tools, plus a cooling rack. Here’s what we consider to be cookie baking essentials and the qualities you should look for when purchasing these tools.
Cookie sheets
The best ones are shiny, silver-colored aluminum sheets without sides. These sheets reflect your oven’s heat, so cookies bake evenly and brown properly. While it’s helpful to have two cookie sheets, so you can prep one batch while the other one is in the oven, you can get by with only one. Just remember, you need to allow your cookie sheet to cool in between batches for perfectly baked cookies. Here’s how to speed up cooling, without warping your sheet: Let cool for 5 to 10 minutes (or until sheet comes to room temperature), run under cold water and dry completely.
Cookie Sheets to Avoid:
- Dark-colored or nonstick sheets, as they can result in overbrowned cookies.
- Insulated cookie sheets can lead to under-browned cookies.
- Jelly-roll pans may prevent cookies from browning evenly, because they have four sides.
Measuring cups and spoons
You will need liquid measuring cups, solid measuring cups and measuring spoons. It’s important to use the correct tools (and measuring technique) as it will result in the right amount of ingredients and ultimately a dough that turns out correctly.
- Solid measuring cups, typically made of metal or plastic, should be used for dry ingredients, like flour, brown and granulated (white) sugar.
- Liquid measuring cups, typically made of glass or plastic, are used to measure milk, oil and other ingredients. Always check your liquid measurement by looking at eye level.
- Measuring spoons are used to measure small amounts of both dry and liquid ingredients, like baking powder and vanilla.
Rolling Pin
A rolling pin can be a loose term. It could mean your grandma’s solid maple pin or just something basic you pick up at your local kitchen store. (If you’re really in a pinch, a wine bottle will do the trick.)
A Cooling Rack
A metal cooling rack is essential to making perfectly baked cookies, because cookies don’t stop baking the moment they leave the oven. Setting your hot cookie sheet on a cooling rack for a minute or two allows cookies to set up enough that you can remove them without breaking. Leave the cookies for much longer though, and they’ll brown too much on the bottom. Transferring from the pan to the cooling rack will allow air to circulate all around the cookies and stop them baking.
With these tools, you’ve got what you need to whip up a batch of cookies. When you’re ready to invest, consider the following tools.
Nice-to-Have Cookie Making Tools
Once you’ve got the basics, you don’t need to buy anything more. But if you do want to upgrade your tools, invest in ones that improve your technique and the quality of your cookies.
Here are some tools that are nice to have when making cookies, plus qualities you should consider when purchasing these tools.
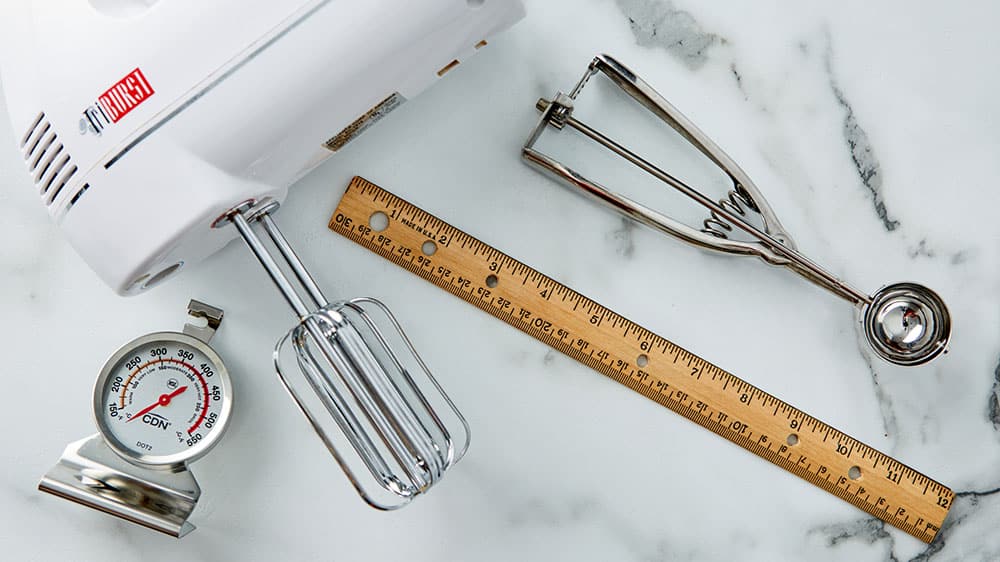
- Cookie scoop
- Oven thermometer
- Electric hand mixer
- Kitchen ruler
Cookie Scoops
Cookie scoops have spring-loaded handles that pops cookie dough out of the cup of the scoop with a click of the handle. They look like mini ice cream scoops. Scoops come in all shapes and sizes—a #70 scoop is equivalent to one level tablespoon, which is a great size for a cookie, but note it’s always best to test your scoop because sizes vary by manufacturer. At around $15, this tool is relatively inexpensive, super convenient and best of all, it ensures a better end product, as cookies of similar size will bake up in the same amount of time. While not strictly essential, we’d put this scoop high on our list of favorite tools.
Oven Thermometer
Ovens are great at many things but displaying their actual temperature accurately is not always one of them. Ovens are often up to 50F degrees off, which is why we recommend buying an oven thermometer. These easy-to-find—try your local hardware store—and inexpensive tools (typically about $5-10) will help ensure that you’re baking cookies at the correct temperature.
Electric Hand Mixer
There’s nothing wrong with using a wooden spoon to mix up your cookie dough—after all, it was good enough for grandma—but if you’ve got one, electric hand mixers are extremely efficient tools for mixing dough. Their speed helps incorporate butter and dry ingredients and some air pockets, which will lead to a nice crumb.
Kitchen Ruler
Dedicate a ruler to the kitchen, so you don’t have to guess how thick your dough is or the size of your cookie cutter. Precision really does leads to better results in baking.
Semi-Pro Cookie Making Tools
For the baker with every gadget, here are a couple of tools that make baking cookies more convenient—even if they do jobs that could be done with far less expensive tools and equipment.
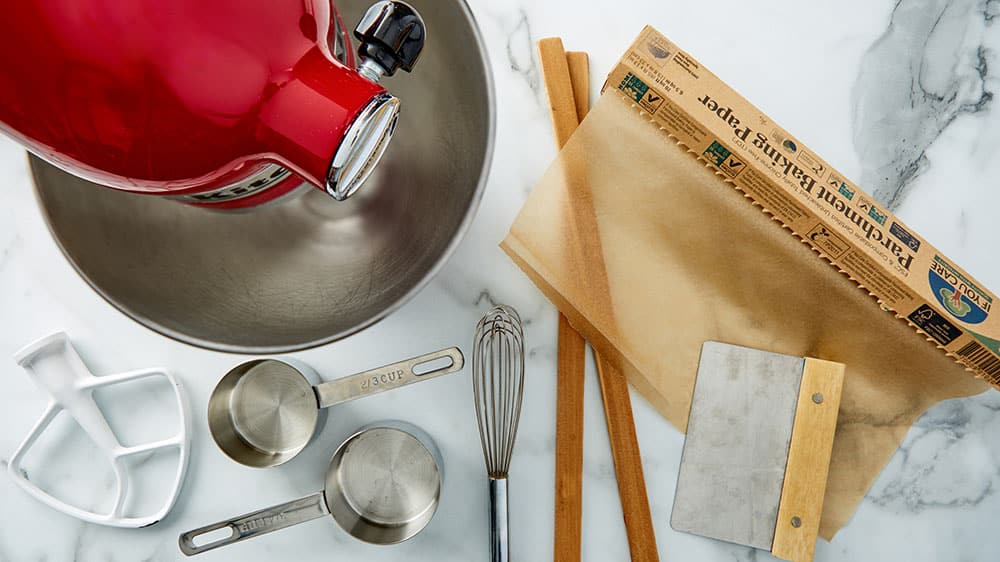
- Stand Mixer
- Parchment paper
- Benchscraper
- Cookie Sticks
- 3/4 measuring cup, 2/3 measuring cup
- Small whisk
Stand Mixer
These high-powered mixers with built-in bowls and attachments make mixing a hands-off affair. It is still important to stop and scrape down the sides of your mixing bowl now and then, but otherwise, they work like a dream. You’ll find stand mixers available in a range of prices. If you decide to purchase one, consider it an investment piece.
Parchment paper
This magical matte paper makes cleanup a breeze. Line your cookie sheet with it and your sweet treats will slide right off after baking, no scrubbing required! Parchment paper is sold by the roll and can be found in the baking section of large supermarkets. As noted above, it’s very different from waxed paper, which cannot be baked.
Benchscraper
This handy, hand-held tool works like a pancake spatula, except it’s held in your hand, rather than being attached to a long handle. Its thin metal lip will slide underneath delicate cutout cookies, divide dough into portions and scrape flour off your counter when you’re cleaning up. A benchscraper is also great for making pizza, pies and other baked goods.
Cookie Sticks
When your cookie recipe calls for rolling out dough to 1/4-inch thickness, make sure you get the right measurement with these clever sticks, which look a little like long, thin rulers. Set one stick on either side of your dough, then use your rolling pin to flatten until the dough is even with the sticks. With this technique, you’ll be able to roll your dough out to the exact thickness needed.
3/4 and 2/3 measuring cups
Skip measuring twice in recipes that call for measurements that fall outside the standard measuring cup sizes of 1/4, 1/3, 1/2 and 1-cup. These non-standard cups are not at all necessary, but they do make measuring and cleanup just a little bit quicker.
Small Whisk
A small whisk is a great all-around tool to have in your kitchen and allows for more precision than larger sized whisks. You’ll find it comes in handy when mixing up dry ingredients, stirring together melted chocolate and more.
Now that you know what tools are best, it’s time to shop for ingredients. Check out our Cookie Baking Essentials.
P.S. Keep this article handy during the holiday season, it’s a perfect guide to shopping for the baker in your life. And if someone asks what you want for Christmas, well, you know where to start!
Meet Carrie!
Carrie Franzen is a consulting recipe developer in the Betty Crocker Test Kitchens with more than 25 years of experience in the food industry. She received a bachelor’s degree in journalism from the University of Wisconsin and a culinary diploma in Eden Prairie, Minnesota. Her lengthy experience includes: a pastry chef and baker for several fine dining restaurants in the Midwest, a chef instructor at Le Cordon Bleu School of Culinary Arts, a manager and instructor for a culinary school in the Twin Cities and she has been published in several cookbooks and magazines. You can count on Carrie to bring goodies to any gathering. From pies to breads to cookies and cakes, Carrie loves to bake!
(function() {
document.addEventListener('DOMContentLoaded', function() {
var componentMetadata = JSON.parse('\x7b\x22componentName\x22\x3a\x22NewsletterCTA_b9911a56-3a0d-4b1c-8521-df6c10ce048a\x22,\x22deferOptions\x22\x3a\x7b\x22deferComponent\x22\x3atrue,\x22deferType\x22\x3a\x22OnDemand\x22,\x22deferId\x22\x3a\x22r262f1006ca8042bdaa511857d75fff35\x22,\x22deferredContainerId\x22\x3a\x22\x2fprimaryColumn\x2finteropInlineNewsletterCta\x22,\x22deferredContainerView\x22\x3a\x22InteropDeferWrapper\x22\x7d,\x22viewName\x22\x3a\x22NewsletterCTA\x22\x7d');
var configuration = {"unsubscribedNewsletters":[{"listId":"1e34a555-89d1-45f0-8f07-b3ae6b01c03c","thumbnailImageUrl":"/-/media/GMI/Core-Sites/BC/Images/Shared/myaccount/newsletters/BC_Thumb157x157.png?sc_lang=en","previewUrl":"https://morpheus3.idpk.net/email_sends/9111/preview","name":"Betty\u0027s Email","isPromo":false}],"settings":{"anonymousCopy":"Ready to Be Inspired?","anonymousDescriptionCopy":"We know you’ll love our daily tips, trends and tasty recipes sent right to your inbox.","anonymousThankYouCopy":"\u003cp\u003eThanks! Your first email is on its way.\u003c/p\u003e\n","anonymousThankYouDescriptionCopy":"\u003cp\u003e\u003cspan\u003eNow that you\u0026rsquo;re signed up, create an account on BettyCrocker.com to save your favorite recipes, learn more about special promotions and get inspired through Betty\u0026rsquo;s expert tips.\u003c/span\u003e\u003c/p\u003e","anonymousButtonText":"Sign up now","anonymousEmailInvalidErrorText":"Please enter a valid email address.","anonymousSubscribeErrorText":"We encountered an error while signing you up. Please try again.","anonymousEmailAddressPlaceholderText":"Enter your email address","anonymousEmailAddressLabel":"Email Address","anonymousLegalCopy":"By signing up, you accept our\u0026nbsp;\u003ca rel=\u0022noopener noreferrer\u0022 href=\u0022https://www.generalmills.com/privacy-security/us-english-privacy-policy\u0022 target=\u0022_blank\u0022\u003e\u003cspan style=\u0022text-decoration: underline;\u0022\u003ePrivacy Policy\u003c/span\u003e\u003c/a\u003e\u0026nbsp;and agree that your information may be used across our\u0026nbsp;\u003ca rel=\u0022noopener noreferrer\u0022 href=\u0022https://www.generalmills.com/food-we-make/brands\u0022 target=\u0022_blank\u0022\u003e\u003cspan style=\u0022text-decoration: underline;\u0022\u003efamily of brands\u003c/span\u003e.\u003c/a\u003e","requiredFieldText":"","standardSmallImageUrl":"/-/media/GMI/Core-Sites/BC/Images/BC/seasonal/2021_Christmas/ncta_bg.png","standardLargeImageUrl":"/-/media/GMI/Core-Sites/BC/Images/BC/seasonal/2021_Christmas/ncta_bg.png","backgroundColor":"#333333","accentColor":"","registrationUrl":"/register/reg-fp?RegAction=SUBSCRIBERUPGRADE\u0026esrc=11275\u0026returnUrl=%2fhow-to%2ftipslibrary%2fbaking-tips%2fTen-Must-Have-Cookie-Tools","registrationLinkText":"Join free!","enableExpandedFields":false,"hideForSessionCookieExpiration":0,"ctaType":"StandardAnonymous","location":"Inline","userState":"Anonymous","sourceCodeOverride":0}};
var moduleName = 'newsletterCta';
var isVueModule = true;
GeneralMills.PandoSites.RegisterControlInstance(moduleName, configuration, componentMetadata, isVueModule)
});
})();
(function() {
document.addEventListener('DOMContentLoaded', function() {
var componentMetadata = JSON.parse('\x7b\x22componentName\x22\x3a\x22ConsumerGeneratedContent_a0de5156-cecc-4461-bb39-279a43e76e9f\x22,\x22deferOptions\x22\x3a\x7b\x22deferComponent\x22\x3atrue,\x22deferType\x22\x3a\x22OnDemand\x22,\x22deferId\x22\x3a\x22rae1aa462ad06485e8f838b5cada2e14a\x22,\x22deferredContainerId\x22\x3a\x22\x2fratingReview\x2finteropRatingReview\x22,\x22deferredContainerView\x22\x3a\x22InteropDeferWrapper\x22\x7d,\x22viewName\x22\x3a\x22ConsumerGeneratedContent\x22\x7d');
var configuration = {"loaderScript":"https://apps.bazaarvoice.com/deployments/bettycrocker/main_site/production/en_US/bv.js","type":"QuestionAndAnswer","language":"en","includeRatings":false};
var moduleName = 'consumerGeneratedContent';
var isVueModule = true;
GeneralMills.PandoSites.RegisterControlInstance(moduleName, configuration, componentMetadata, isVueModule)
});
})();